2 Answers
### 1. **Understanding What a Short Circuit Is**
A short circuit occurs when an unintended connection forms between two points of different potential (e.g., a live wire touches a neutral or ground wire). This can cause excessive current to flow, potentially leading to overheating, circuit damage, or even electrical fires.
### 2. **Common Signs of a Short Circuit**
Here are some typical signs that suggest you might have a short circuit in your wiring:
- **Tripped circuit breakers or blown fuses**: If your breaker trips immediately after turning on a device or flipping a switch, it could indicate a short.
- **Burning smell or scorch marks**: These can indicate overheating due to excessive current flow.
- **Buzzing or popping sounds**: Faulty wiring might create unusual sounds before a short.
- **Flickering lights or intermittent power loss**: These may be subtle signs of a developing short circuit.
### 3. **Tools Needed to Diagnose Wiring Problems**
- **Multimeter**: Essential for checking continuity, resistance, and voltage. A good multimeter helps detect breaks or unintended connections in wiring.
- **Voltage tester**: Quick tool for determining whether a wire is live.
- **Wire strippers/cutters**: To access the wires inside a cable.
- **Insulation tape**: Useful for temporary insulation.
- **Screwdrivers**: For removing outlet covers and accessing electrical panels.
- **Flashlight**: Ensures visibility, especially when checking inside walls or outlets.
### 4. **Steps to Identify a Short Circuit**
#### a) **Turn Off Power to the Circuit**
- **Safety first**: Before investigating, turn off the power to the affected circuit by switching off the relevant circuit breaker or removing the fuse.
- Use a **voltage tester** to confirm the circuit is dead.
#### b) **Visually Inspect the Wiring**
- Start by examining outlets, switches, and electrical panels.
- Look for any visible signs of damage, such as frayed wires, burned insulation, loose connections, or broken outlets.
- Check for loose or damaged wires behind outlets and switches.
#### c) **Test Continuity with a Multimeter**
- Set the multimeter to **continuity** mode. Continuity is the flow of electricity along a path, and if you get continuity where it shouldn't exist (e.g., between a live wire and ground), that suggests a short.
- Check for continuity between the **hot (live)** wire and **neutral** wire, and between the **hot wire** and **ground**.
- If you detect continuity between the hot and neutral (when the circuit is off), there's likely a short.
#### d) **Isolate the Problem**
- Disconnect all devices (lights, appliances, etc.) from the circuit.
- Check each section of the wiring separately to isolate where the short is occurring. For example, you might start by disconnecting one outlet at a time from the circuit to see if the problem persists.
- Reconnect one device at a time, then test again. This helps determine if the problem is in the wiring or in an attached device.
#### e) **Inspect Switches, Outlets, and Junction Boxes**
- Remove cover plates and examine inside for signs of overheating or loose wiring.
- Check that no wires are touching where they shouldn’t be. For instance, ensure hot wires aren’t touching ground wires or neutral wires.
- In junction boxes, ensure wire nuts (connectors) are tightly secured and insulation is intact.
### 5. **Fixing a Short Circuit**
Once you've identified the short, fixing it depends on its cause:
#### a) **Repairing Damaged Wiring**
- **Frayed or damaged wires**: Strip the damaged section and reconnect the wires properly. Use wire nuts or crimp connectors to join wires securely. Wrap exposed connections with electrical tape if necessary.
- **Burnt wires**: Cut out any burnt sections and replace them. Make sure to leave enough slack for future repairs.
- **Loose connections**: Tighten any loose connections, and if necessary, trim back the wire to expose fresh copper for a better connection.
#### b) **Replacing Faulty Outlets or Switches**
- If the problem lies in a broken switch or outlet, it’s often easier to replace the component entirely. Make sure the new switch or outlet is rated for the same current as the previous one.
- Ensure proper connection: typically, the **black (live)** wire connects to the brass screw, **white (neutral)** to the silver screw, and **green (ground)** to the green screw.
#### c) **Insulating Exposed Wires**
- Any exposed copper should be covered using electrical insulation tape or heat-shrink tubing. This prevents accidental contact between wires.
#### d) **Fixing Overloaded Circuits**
- If the short circuit is due to overloading (e.g., too many devices on the same circuit), consider redistributing the electrical load or installing a dedicated circuit for high-power appliances.
### 6. **Testing After Repair**
Once you have fixed the issue:
- Reconnect all wiring or devices.
- Turn the circuit back on at the breaker.
- Use a multimeter to test that there is no continuity between live and neutral or live and ground when the circuit is off.
- Test the outlets or switches by plugging in devices and verifying normal operation.
### 7. **Preventive Measures**
- **Label circuits**: Ensure your circuit breaker panel is labeled clearly. It helps quickly locate the affected area.
- **Check wiring regularly**: Especially in older homes, periodic inspections of electrical systems can prevent potential issues.
- **Install AFCI or GFCI protection**: Arc-fault circuit interrupters (AFCI) and ground-fault circuit interrupters (GFCI) can detect faults and shut off the circuit to prevent hazards.
- **Don’t overload circuits**: Be mindful not to overload circuits with too many high-power devices.
- **Hire professionals when necessary**: If you're unsure or dealing with a complex wiring system, consulting an electrician ensures safe repairs.
### Conclusion
Identifying and fixing a short circuit requires careful observation, the right tools, and a systematic approach. By following these steps—turning off the power, visually inspecting the wiring, testing with a multimeter, and carefully repairing the fault—you can troubleshoot and resolve common wiring problems safely.
1. **Safety First**: Turn off the power at the circuit breaker to avoid electric shock.
2. **Visual Inspection**: Look for obvious signs of damage like frayed wires or burned areas.
3. **Test for Continuity**: Use a multimeter to check if there is a continuous connection between points where there shouldn’t be. A short circuit will show an unexpected low resistance.
4. **Isolate the Problem**: Disconnect devices and switches one at a time to see if the short circuit persists, which helps pinpoint the faulty section.
5. **Check Connections**: Ensure all wire connections are secure and properly insulated.
6. **Replace Faulty Wiring**: If damaged wires or components are found, replace them with new ones, ensuring to follow correct wiring practices.
7. **Test the Circuit**: After repairs, turn the power back on and test the circuit to ensure it’s functioning correctly.
If you're unsure or uncomfortable with these steps, it's best to consult a licensed electrician.

Applied Physics
Signals and Systems

Digital Electronics
Basic Concepts
Basic Laws
Units
Ohmic Resistors
Capacitors and Inductors
RC Circuit
First-Order Circuits
Second-Order Circuits
Principles Of Circuit Analysis
Sinusoids and Phasors
AC Steady-State Analysis
Single Phase A.C. Circuits
Three-Phase Circuits
Resonance In Series And Parallel Circuits
Network Theorems
Thevenin's Theorem
Two-port Networks
Digital Electronics
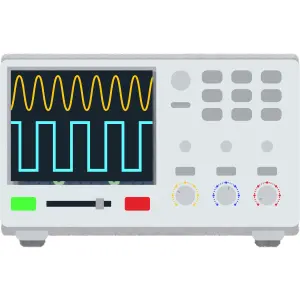
Oscilloscope
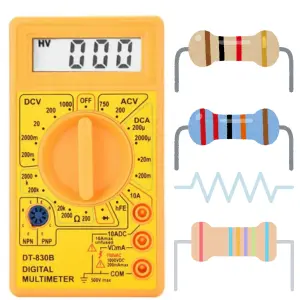
Ohmmeter
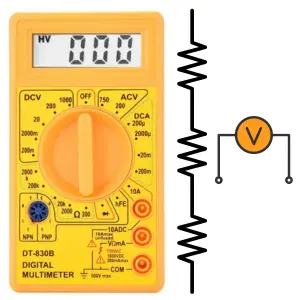
Voltmeter
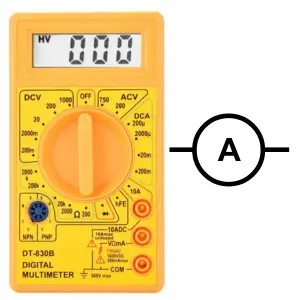
Ammeter

Induction Motor
Transformer
Operational Amplifiers
Components
Symbols
Formulas
EE Notes
EE Dictionary

MCQ Quiz

Interview Q&A
Power Electronics Book
Advanced Calculator

Basic Calculator
Simulator
Videos
Q&A
Capacitance Meter

Two Way Switch
Electrical Machines
Power Electronics

Electrical Drives & Their Control
Electrical Safety & Standards

Basics of Electronics Engineering

Electromagnetic Fields

Electrical Machines

More Items Coming Soon...